Off-Chain Computation: Statistical Analysis With Chainlink
3y ago•
bullish:
16
bearish:
4
Share

As the world discovers the expanding possibilities of smart contracts, transaction volume across blockchains is seeing an exponential increase. Along with this surge of adoption, developers are continuously expanding what smart contracts can process and compute. Between the rapidly growing use and complexity of smart contracts, secure off-chain computation is becoming an increasingly important service for optimizing gas costs, reducing network congestion, and enabling feature-rich dApps.
With their varying nature, however, computational tasks are inherently difficult to generalize. For example, unlike retrieving data from an API that has some standardized GET/POST methods, computation can be performed in a variety of ways and across a multitude of datasets that may not have any consistency between them. Performing a statistical analysis of weather data, as we will do in this tutorial, is vastly different than performing a calculation for, say, image recognition. Because of this variety in tasks, a flexible framework is needed to allow developers to tailor their solution exactly to their specific computational task.
Computing on Weather Data With Chainlink’s Highly Configurable Oracle Networks
Chainlink is architected to provide this computational flexibility to smart contract developers, offering a chain-agnostic and adaptable framework that allows nodes in an oracle network to take on a multitude of tasks, including serving any data request and performing any off-chain computation. Chainlink External Adapters allow developers to create portions of off-chain code that can be run in any manner the developer sees fit, so long as the input and output adhere to the interfaces defined by the Chainlink node(s), which then commits the result back on-chain. This pluggable architecture enables Chainlink nodes to mix and match External Adapters with very different functionalities needed for the task at hand. To learn more about developing External Adapters, check out our Building and Using External Adapters article.
For this guide, we’ll start with PatrickAlphaC's OpenWeather External Adapter as our template and modify that to include some additional computation. In this OpenWeather adapter, the Chainlink node is provided a location and returns a JSON object containing the current weather data at that location using the OpenWeather API. This is excellent if you need the current raw weather data, but sometimes raw data isn’t enough. A user might want to make a decision based on historical data, or more specifically, statistical analysis of historical data. Rather than a single API call for raw data, the user would now require multiple calls for multiple days, along with trimming the data and then performing whatever desired analysis on it.
In our case, we wish to find the standard deviation over the last 5 days (the limit of the free tier OpenWeather API). As you can see, this problem requires an order of magnitude more steps than just retrieving the API data. If we were to do this on-chain, gas costs would balloon rapidly from posting multiple pieces of data on-chain and then iterating over that dataset for multiple loops in order to compute the standard deviation. This computation would effectively become impossible to perform on-chain since the gas cost would rise to the point that no reasonable user would make use of it.
The Chainlink Network provides a cost-efficient solution by bringing all that heavy lifting off-chain, where it can perform gasless computation at the full compute speed of native computer hardware. Nodes in a decentralized oracle network only commit the verifiable output on-chain, where it benefits from the auditability and consensus of blockchains. In this way, smart contract developers can build hybrid smart contracts that leverage the best of both realms—the trusted execution of on-chain contract logic and the cost-efficiency of off-chain services powered by Chainlink oracles.
With the broadened functionalities of Decentralized Oracle Networks (DONs) outlined in the Chainlink 2.0 whitepaper, the capabilities of External Adapters will be extended even further via an off-chain consensus mechanism. Currently, off-chain computation must be run on multiple nodes and then checked for consensus on-chain if the user has a high value contract they wish to secure with a decentralized computation input. This still leaves some of the computation, the consensus, on-chain. With DONs, subnets of the Chainlink Network can be dedicated to a computational task and can come to their own consensus through cryptographic proof mechanisms such as off-chain reporting (OCR), threshold signatures, and secure multi-party computation. This further reduces the on-chain load, as nodes only need to post the cryptographic proof of their distributed computation consensus on-chain. This off-chain consensus model will enable DONs to augment blockchain networks and layer 2 solutions in even more powerful ways than we already have today with the standard External Adapter plug-in architecture.
Designing the Off-Chain Computation
Let’s begin with how you would design this off-chain computation, today, using the currently available External Adapter capability. You can find the full code for this adapter on GitHub: Chainlink Off-Chain Compute Weather Adapter. Specifically, what we want to compute with this External Adapter is if the current day’s temperature is greater than ½ standard deviation from the past four days. This could be useful for crop insurance smart contracts that would pay farmers in the event of extreme weather conditions. With a contract like this to pay farmers when the weather deviates, farmers can hedge their risk and receive automatic insurance payouts to offset potential lost crops and revenue.
First, we need to modify the API endpoint, as per OpenWeather’s API documentation, since we’re now requesting historical data instead of current data. We’re using “onecall/timemachine”, which is their historical endpoint. Furthermore, a time variable has been added since the API request now needs a historical time specified for which day’s data should be retrieved. Lastly, we’ve added a tempArray simply to hold the multiple days of data which will be retrieved and computed on.
Building the API Request Loop
Next, we have the main API request loop. Since five days of data is needed, we must loop five times, making one API request each day and accumulating the data in tempArray. Specifically, we want the average temperature of each day since our ultimate goal is to determine if the current day’s temperature is greater than ½ standard deviation from the past four days. So for each day, we add up all 24 hours of temperatures and divide by 24 for the mean. For each loop, we subtract one day in seconds so that the following API request is one day prior.
Now that we have the mean temperatures collected, we can begin the main body of computation on the data to determine the standard deviation. The function calcStandardDev(temps) handles this. Notice that this code is standard JavaScript. There are no specific Solidity functions or syntax since this code exists completely off-chain. The math performed here is simply the method to calculate standard deviation, as you would in any programming language. This method is to find the mean of all the temperatures, which is stored in the mean const, subtract the mean from each temperature, square them, and store those values in the diffArray, sum all the squared differences and divide by the number of differences to get variance and then finally, square the variance to result in the standard deviation.
At this point, we now have 5 loops of API requests, 4 loops to average the temps, and 4 loops to generate the differences, each loop involving non-trivial operations such as API data retrieval, exponential power functions, and square root functions. It’s clear that even for this relatively standard task of calculating standard deviation, the cost to perform this on-chain would balloon past the point of cost-effectiveness, especially when considering more than five days worth of data, as we do here.
With the standard deviation calculated, all that remains is to return our response in the callback to the requesting contract. We’re trying to determine if today’s temperature (tempArray[0]) is greater than ½ standard deviation away from the mean of the last four days' temperatures. This means both ½ deviation above or ½ deviation below, so we return true if either case is met. Since our return to the contract is a JSON object, we format it to meet the JSON payload defined in the Chainlink External Adapters documentation. The first key is the id (which is passed in with the request) and the second key is the data, which in our case, only contains the answer, true or false.
Creating a Bridge
The node operator performing this task, in order to support the External Adapter, must create a bridge for it in their node UI and add the adapter’s bridge name and address:port (default: 8080) to their supported tasks.
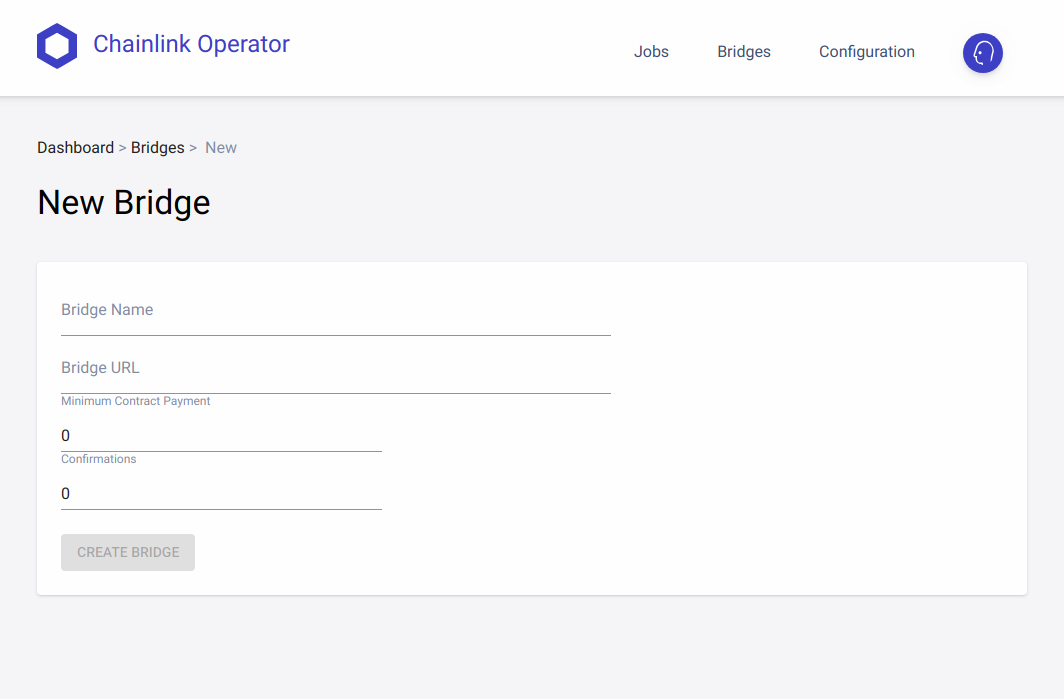
This Bridge connects an External Adapter that is serving data at the specified URL to the node which can then utilize it within its jobs. Under the Jobs page of the Chainlink Operator dashboard, the Node Operator defines a series of tasks in JSON format like so:
First in line we have the runLog task. This is a default task that acts as the initiator for the job when a contract places a request. Then we perform our standard deviation calculation using the Bridge we defined and named standarddev. Since the response is the type Boolean, we add an ethbool task to handle that response. Finally, there is the ethtx task, which returns the completed response back to the smart contract that requested it via this task’s specific jobID.
This completes the full process of creating the External Adapter and configuring a Chainlink Node to run it via Bridge and Job Spec. Now we’re ready to utilize it in a smart contract.
Making the Request
This snippet of code is all that’s needed to make the request and have it fulfilled. To start, you need the jobID, which is specific to the standard deviation task you wish to run and the address of that oracle node which is running it. As for the request itself, the only portion of the general request structure that’s modified is that we specify the callback as the fulfillStandardDev function and we add the two inputs (latitude and longitude) and the copyPath of “answer” to our request. This tells the node to fulfill the request with the answer key from its JSON data, since “answer” is what the External Adapter names the key where it returns true or false. Finally, we have our response in the callback function saved to our isGreaterThanHalfSD Boolean. At this point, we can perform any action desired based on the result, such as releasing funds to a farmer who purchased crop insurance when weather conditions meet specific predefined parameters—in this case, weather that deviates greater than ½ SD from the past four days.
Conclusion
As you can see, the bit of on-chain code is far simpler than the off-chain portion in the External Adapter. On-chain, we simply send a request struct to a Chainlink node and receive a Boolean answer, whereas off-chain, there are multiple loops of addition, subtraction, division, exponents, and square roots. In architecting our smart contract this way—as a hybrid smart contract—we’ve saved users significant overhead from the gas costs of performing computations on-chain, while still maintaining a chain of auditability and consensus on-chain, giving users a wider range of functionalities with greater efficiency.
If you’re a developer and want to integrate Chainlink into your smart contract applications, check out the Chainlink developer documentation or reach out here.
- Chainlink 2.0 Lays Foundation for Adoption of Hybrid Smart Contracts
- How Chainlink Supports Any Off-Chain Data Resource and Computation
- Building and Using External Adapters
Docs | Discord | Reddit | YouTube | Telegram | Events | GitHub | Price Feeds | DeFi | VRF
3y ago•
bullish:
16
bearish:
4
Share

 Manage all your crypto, NFT and DeFi from one place
Securely connect the portfolio you’re using to start.

bullish:
0
bearish:
0


bullish:
0
bearish:
0
