

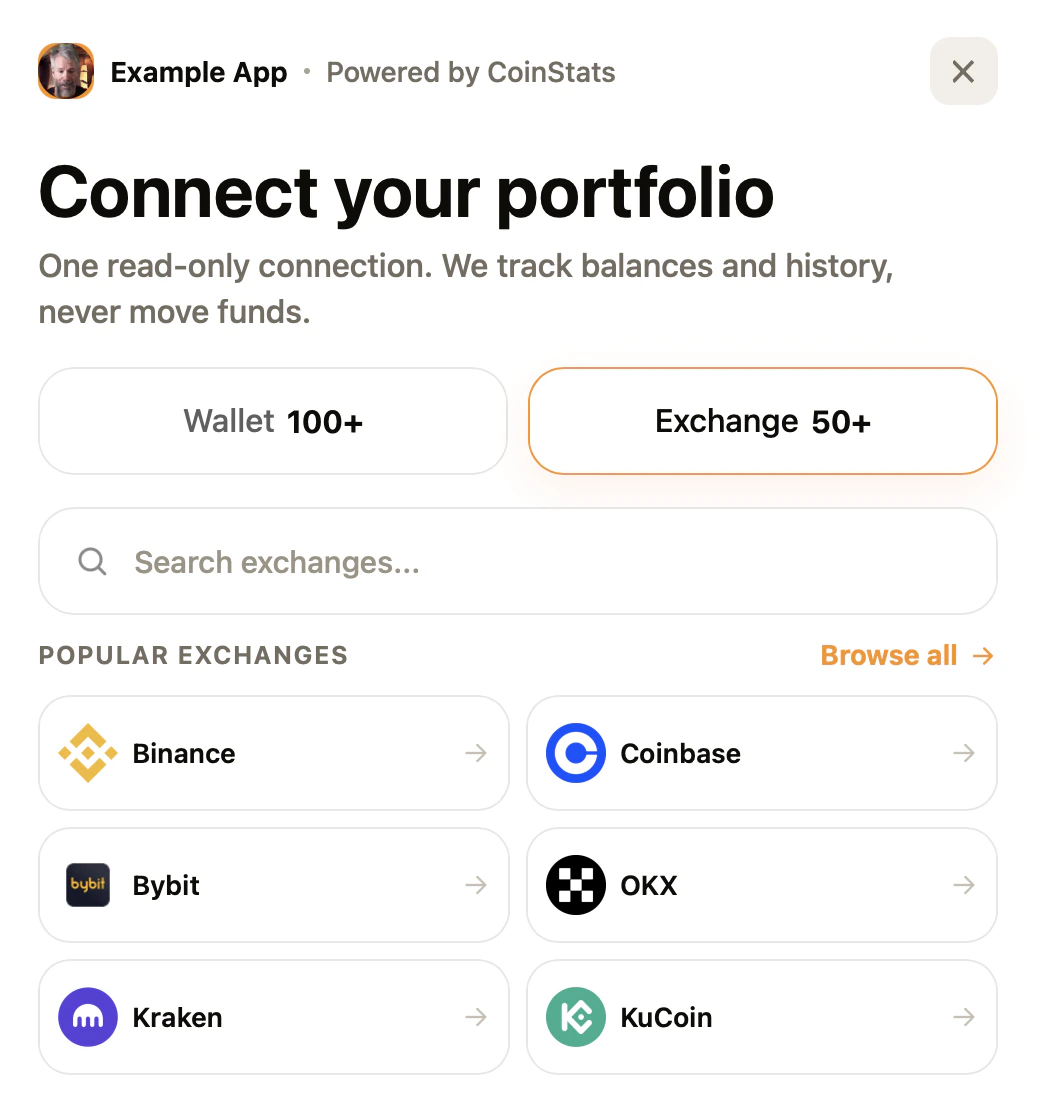
state value.
What value this gives
- Add wallet and exchange connection to your product without building exchange credential forms yourself.
- Keep API keys out of browser code. The ConnectKit ID is public; the API key remains server-side.
- Receive a
portfolioId,connectionId, and your originalstatewhen the connection finishes. - Control which domains can open ConnectKit with allowed origins and redirect URLs.
Example values
Use values like these while testing the flow:Set up ConnectKit
1
Open ConnectKit settings
Go to the API dashboard, open ConnectKit, and click Add.
2
Add the trusted values
Fill in the fields that define where ConnectKit can run and how it appears to users: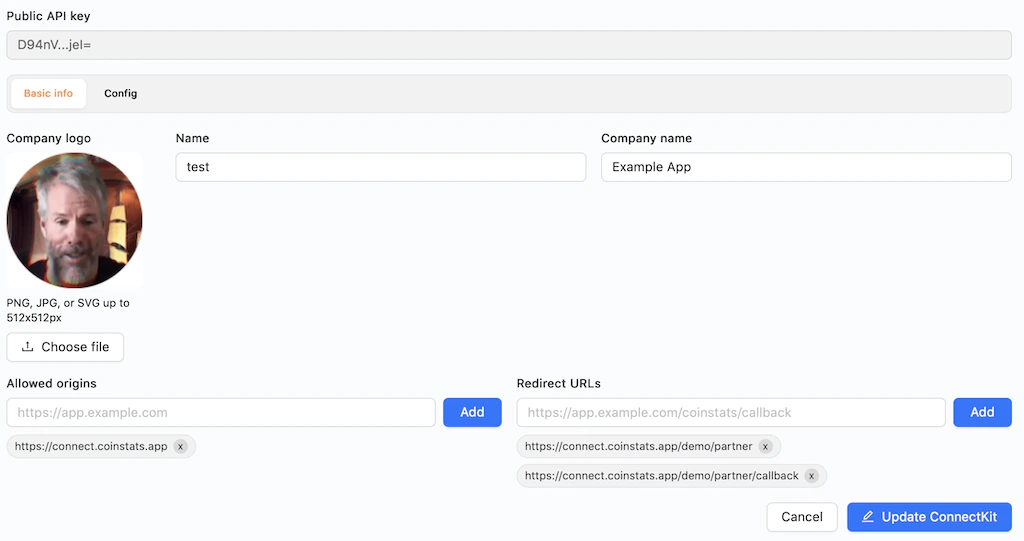
- Company logo: Upload the logo shown in the hosted connection popup.
- Name: Add an internal name for this setup, such as
testorprod_app. - Company name: Add the app or brand name users will see, such as
Example App. - Allowed origins: Add every browser origin allowed to open ConnectKit.
- Redirect URLs: Add the exact callback URLs CoinStats can return to after connection, one per environment.
- Config: Choose the default mode, appearance, and accent color if you want defaults different from the SDK call.
3
Copy the ID
After saving, copy the ID from the list. This ID is safe to use in browser code.
4
Open the hosted popup
Use the npm package or hosted script to open the popup from your app. The popup runs on
connect.coinstats.app.NPM integration
Install the SDK:Script tag integration
For plain HTML pages, load the hosted browser bundle:Handle the result
When the user finishes, match the returnedstate with the user or session that started the flow. Store the returned portfolioId or connectionId on your side.
Example redirect:
Before going live
- Add every production origin that can open the popup.
- Use HTTPS redirect URLs in production.
- Generate and keep the API key in the CoinStats API dashboard.
- Store the returned portfolio or connection ID with your user.
- Keep API keys server-side. The frontend only needs the ConnectKit ID.