VeChain Ecosystem Onboarding Guide
3
1
Getting started in crypto can be a challenge. Wallets, seed phrases, transaction fees — all of them present a hurdle for new users. When taken together? A veritable minefield of terms and technologies that hinder adoption.
At VeChain, our guiding philosophy has been to deploy technologies that make the onboarding process simple and seamless. From fee delegation to technologies that abstract the blockchain away, we understand that minimising the visible parts of Web3 leads to greater adoption.
Despite that, in this current paradigm, some knowledge is still necessary, and so we’ve prepared a simple onboarding guide for yourself, friends or family, as well as some best practices along the way.
Read on to discover all you need to know about getting started with VeChain!
Step 1: Install VeWorld (official wallet)

1.1 Get VeWorld from official stores only
Every Web3 journey begins with a wallet. VeChain’s is called VeWorld, the official self-custody wallet for VeChain, and our finely tuned ‘super-app’, and hub of experiences.
You can download VeWorld from:
- iOS App Store
- Android app stores
- Chrome Extension library
Pro tip:
Only download VeWorld from official links to ensure your software comes as intended. Avoid ‘APK repost’ sites and other third party websites.
Step 2: Create a new wallet, or import an old one

Your wallet is your home for storing and securing on-chain assets, as well as your method for accessing VeChain-based blockchain applications. To get started:
2.1 Create a new wallet
On mobile, VeWorld guides you through:
- Tap Get Started → Create new wallet
- Secure with biometric or a password
On the Chrome extension:
- Get Started → Create Password → Create Wallet
- Confirm the recovery phrase words when prompted
2.2 Import an existing wallet via seed phrase
If you already have a wallet and have your seed phrase handy then you can quickly and easily import your assets to a separate wallet.
- Choose Import Wallet
- Enter your 12-word recovery phrase in order
2.3 Optional: connect a hardware wallet
VeWorld supports connecting Ledger hardware wallets for enhanced self-custody. Using hardware devices enhances security by introducing an extra layer of verification using a physical device.
Step 3: Security basics before adding funds
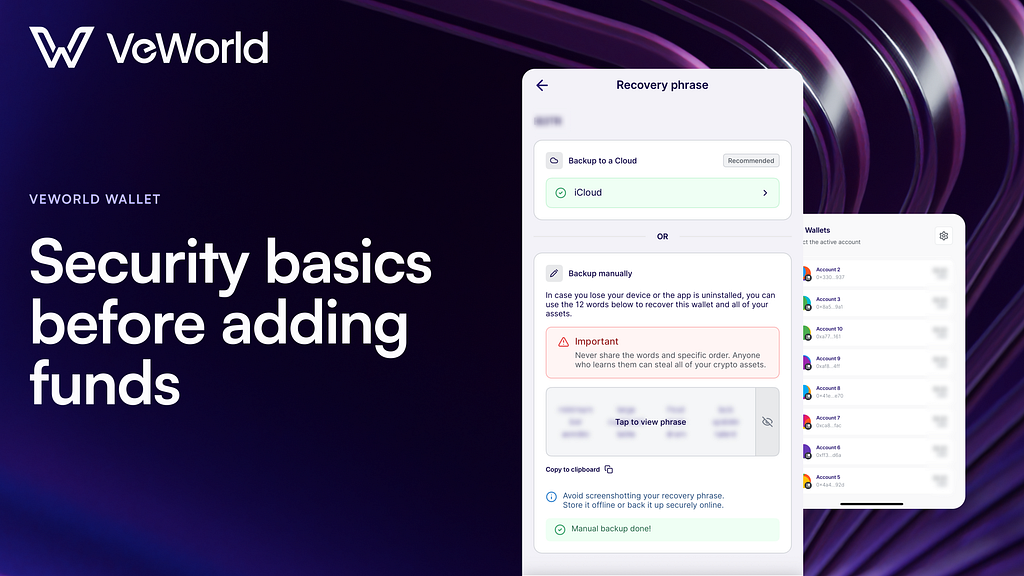
3.1 Recovery phrase rules
- Back up your 12/24-word recovery phrase offline.
- Never share it. Never screenshot it. Never paste it into websites or DMs.
- Anyone who has your phrase has control of your assets.
Recommended storage: paper backup in a secure place (and consider redundancy). If you use any digital storage, understand the trade-offs and secure it appropriately-screenshots are especially risky.
3.2 Do a “Dry-run” backup test
Before you move meaningful funds to your wallet:
- Do a test import with your recovery phrase on a spare device kept offline (or in a controlled environment).
- Confirm the imported address matches.
- Then wipe/secure the test device.
This is the fastest way to prove your backup works before you need it.
Step 4: Fund & make your first transaction
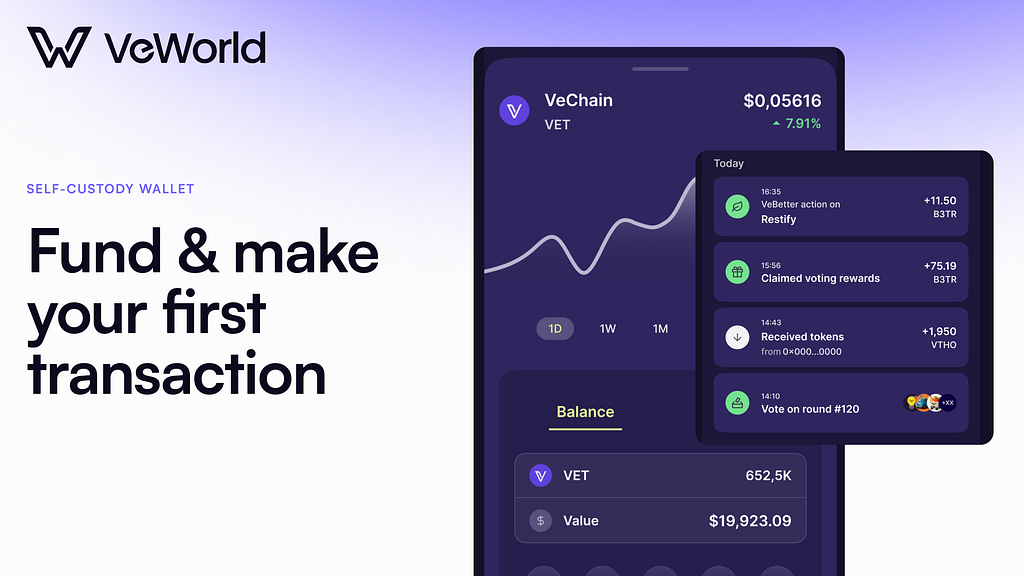
4.1 Acquire VET and withdraw to VeWorld
- Acquire VET on your preferred exchange.
- Using your newly generated wallet public key, withdraw VET from the exchange to your VeWorld address — always do a test transaction first with a small number of VET tokens
- If the exchange asks for a network, choose VeChainThor — not an unrelated chain.
4.2 Make sure you have VTHO for fees
Transactions consume VTHO (VeChainThor Energy) to pay for transactions. You can generate VTHO by staking VET on the StarGate staking platform (LINK) or by acquiring it from the market.
So, for your first transactions, plan to:
- Source a small amount of VTHO via a reputable on-ramp/swap, OR
- Use apps/wallet flows that support fee delegation (some experiences can sponsor gas). VeWorld supports fee delegation natively for compatible apps.
4.3 Send a test transaction
Do a “test send” to your new wallet before anything significant:
- Send a small amount of VET to a second address you control (or a trusted recipient).
- Confirm the transaction
- Verify the tokens arrive in your wallet
- Send the token back to where you originally sent it from, thus verifying control
Step 5: Connect to apps safely
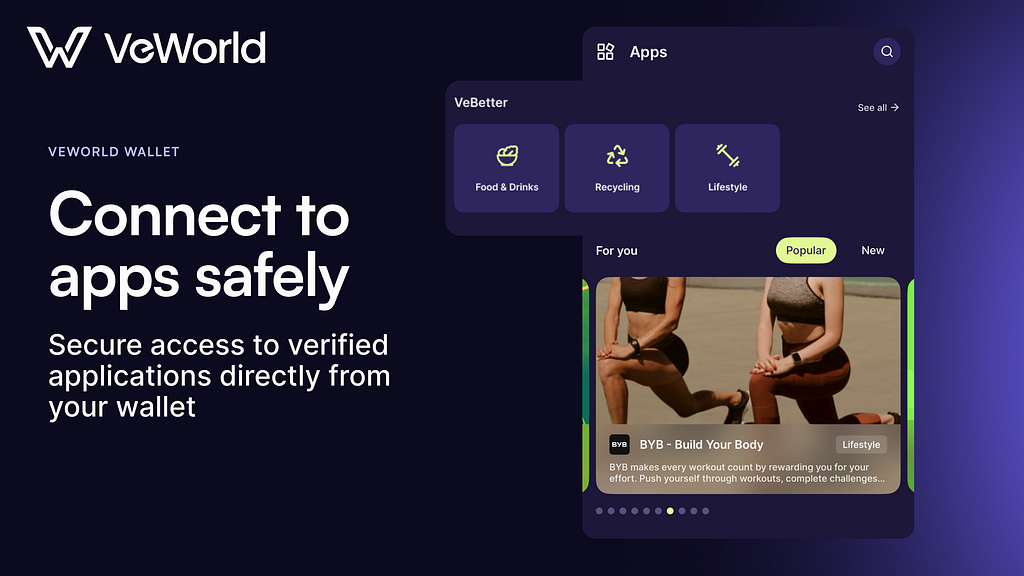
5.1 Connect using the ‘Apps’ tab in VeWorld
From VeWorld you can connect to the VeBetter ecosystem and other on-chain applications. By accessing apps through the ‘Apps’ tab, you can be sure you are accessing legitimate links. Always ensure you are only connecting your wallet to verified links.
Step 6: Start earning and getting rewarded

Now your wallet is all set up, it’s time to start exploring the ecosystem.
To experience VeChain’s ‘X2Earn’ app platform — VeBetter — an ecosystem that rewards you for activities you can do throughout your day IRL. check out our recent guide that tells you all you need to know: VeBetter
To start staking and earning VTHO rewards from your VET tokens, you can follow our staking guide to get started: Staking guide
Essential resources
- VeChain Foundation website: ecosystem overview + products
- VeWorld: wallet + support
- VeChain Docs: core concepts + developer resources
- Builder Hub: academy, docs, SDKs, grants
- VeBetter Grants Program: webpage
- Official LinkTree: link
- Official Telegram community — plus announcement/regional channels
- VeChain App Hub / VeBetter apps — App Hub
3
1

 Gérez tous vos cryptos, NFT et DeFi à partir d'un seul endroit.
Connectez de manière sécurisée le portefeuille que vous utilisez pour commencer.

0
0


0
0