Sia S3 Integration: Nextcloud
1
0
How to mount Sia as external storage in Nextcloud using S3
What is Nextcloud?
Nextcloud is an open-source content collaboration platform. It’s like your own Cloud service that runs on your own hardware. You can use it for storing and sharing files through a web interface, mobile app, or desktop client, and even to collaborate with others or as a communication platform. There is almost no limit to what it can do with its open plugin store.
Why use Sia with Nextcloud?
Sia and Nextcloud are the perfect match. Nextcloud offers many features to organize and share your files with coworkers, family, and friends. However, getting the disk space to store a lot of data can be pretty expensive, especially if you want to store your data redundantly to avoid losing your data to a failing hard drive.
With Sia, you get:
- Affordable and fast storage without spending a lot of money on hard drives
- Built-in (geo-)redundancy and monitoring of file health
- Client-side encryption by default to protect your privacy
- No vendor lock-in
- It’s all open-source!
Step 1: Setup Nextcloud
At first, you will need to install and run Nextcloud if you don’t have it already. There is already a lot of excellent documentation on how to do that, so please refer to that before proceeding to step 2.
- Download and install Nextcloud
- Installation and server configuration - Nextcloud latest Administration Manual latest documentation
Step 2: Setup renterd
To rent storage on the Sia network, you need to install the renterd service. Follow our setup guide for your operating system.
Enable renterd’s S3 API
To use Sia with Nextcloud we will need to rely on its integration with S3. This API is not enabled by default but configuring it is straightforward.
There are three cli flags that deal with S3:
- s3.enabled: has be set to true to make sure renterd exposes the S3 API
- s3.address: defaults to [localhost:8080](
- s3.disableAuth: can be used to disable authentication
The S3 API is authenticated through key pairs that can be configured by setting them in the environment under the key RENTERD_S3_KEYPAIRS_V4. A key pair consists of an ACCESS KEY ID followed by a SECRET ACCESS KEY, separated by a comma.
So for example: DYaeKAjcEtyfrjZx,s3iscool is a valid key pair.
After setting up renterd and enabling S3, it’s a good idea to quickly test it out. This can be done using either the AWS CLI Client or Minio Client. If you use the minio client, setting an alias is very useful. Let’s try and list the buckets to see if it works, it should return the default bucket that will have been created automatically when you started renterd for the first time.
# alias our s3 endpoint for ease of use
mc alias set s3 https://localhost:7070 DYaeKAjcEtyfrjZx s3iscool

# list all buckets
mc ls s3
[2023-09-18 19:09:37 CEST]     0B default/
Step 3: Mount your bucket
Now that you have both Nextcloud and renterd running, we can mount a renterd bucket as a folder. To keep it simple, this guide will mount the default bucket. That’s the bucket to which files get uploaded by default if no other bucket was specified. If you want to use a different one, e.g., a nextcloud bucket, check out our API docs on creating a new bucket using the API. Bucket support will be available in the UI soon.
Enable “External storage support”
Before we mount the folder, we must ensure that “External storage support” is enabled in Nextcloud. From the landing page, click the round shape with your user’s initials in the top right. This should open a dropdown menu like the following:
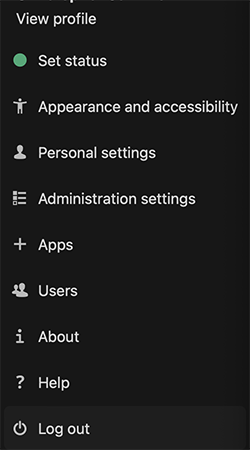
From there, select “Apps”. This takes you to the apps menu, where you should find the “External storage support” — app. Make sure to enable it if it isn’t already. It should look like this if it is ready to use (The button on the right says “Disable”):

Configure backend
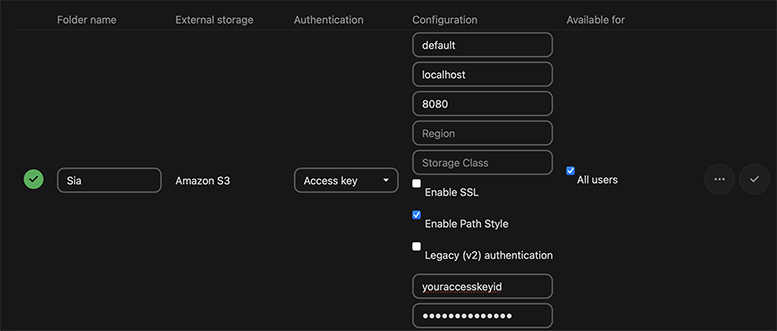
Now, go to “Administration settings” from the same dropdown menu as before. On the left, you will find two sections. In the lower section labeled “Administration”, select “External storage”. From there, you should get to a menu that looks like this:
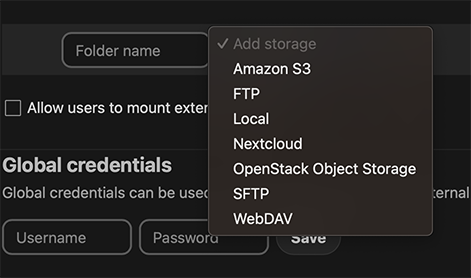
Select “Amazon S3” and give your folder a friendly name like “Sia”. For “Authentication” select “Access key”. Fill in the bucket “default”, the hostname of your renterd instance (e.g., localhost), and the port “8080” (unless you changed the default port). Also, make sure to tick “Enable Path Style” and fill in your access key information. It’s the same as the one you specified when starting renterd. If you want to give all your Nextcloud users access to mount that folder, select “All users” as well. Finally, click the check mark on the right. If everything was configured correctly, a green check mark should appear on the left.
Finished!
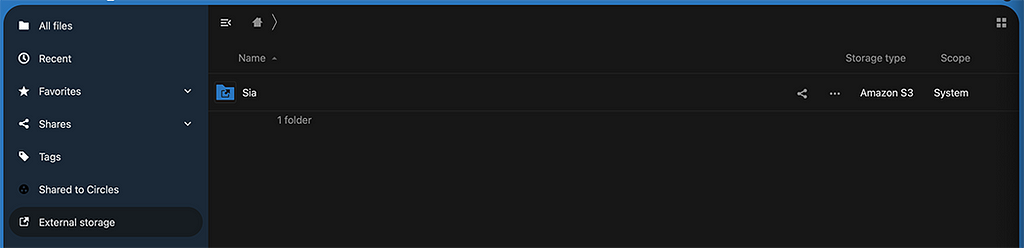
Congratulations! You successfully configured Sia as a backend for your Nextcloud instance. If you click the “Files” tab on the top and then “External storage” in the menu on the left, you should see the folder show up like this:
If you are looking for a storage solution that is truly decentralized, secure, private, and resilient, consider Sia. You can learn more about Sia from our website and documentation. You can also join our community of data storage enthusiasts and developers.
Sia is the future of decentralized storage, and you can have a part in shaping it!
Sia S3 Integration: Nextcloud was originally published in The Sia Blog on Medium, where people are continuing the conversation by highlighting and responding to this story.
1
0
 Verwalten Sie alle Ihre Kryptowährungen, NFTs und DeFi an einem Ort
Verbinden Sie sicher das Portfolio, das Sie zu Beginn verwenden möchten.