
1
1
Theta EdgeCloud gains a critical new feature today by allowing users to launch GPU clusters, a key requirement in training large AI models. In addition to individual GPU nodes, Theta EdgeCloud now lets you create a GPU cluster consisting of multiple GPU Nodes with the same type in the same region. The nodes inside a cluster can communicate directly to each other with minimal latency, which makes distributed AI model training possible on Theta EdgeCloud.
Clustering multiple GPUs together allows parallelization across devices, significantly speeding up training time compared to single GPUs. While training large models like GPT, BERT, or diffusion models can take days to weeks on a single GPU, a GPU cluster can reduce this to hours or even minutes, enabling faster iteration, experimentation, and deployment. Using GPU clusters also enables horizontal scaling — dynamically adding more GPUs to handle larger models or workloads. This makes them essential for training foundation models or multi-billion parameter architectures, which can’t fit into the memory of a single GPU.
The addition of this crucial feature is one of many in the works to make Theta EdgeCloud the leading decentralized cloud for AI, media & entertainment. It is one of the most asked features by dozens of EdgeCloud customers, some of the leading AI research centers in the world. You can also get started using GPU clusters on EdgeCloud today with the following guide or in the official Theta Documentation.
To launch a GPU cluster, First navigate to the “GPU cluster” page under the “Training” category, which can be assessed by simply clicking on the “AI” icon on the left bar, and then click on the “GPU Cluster” tab.

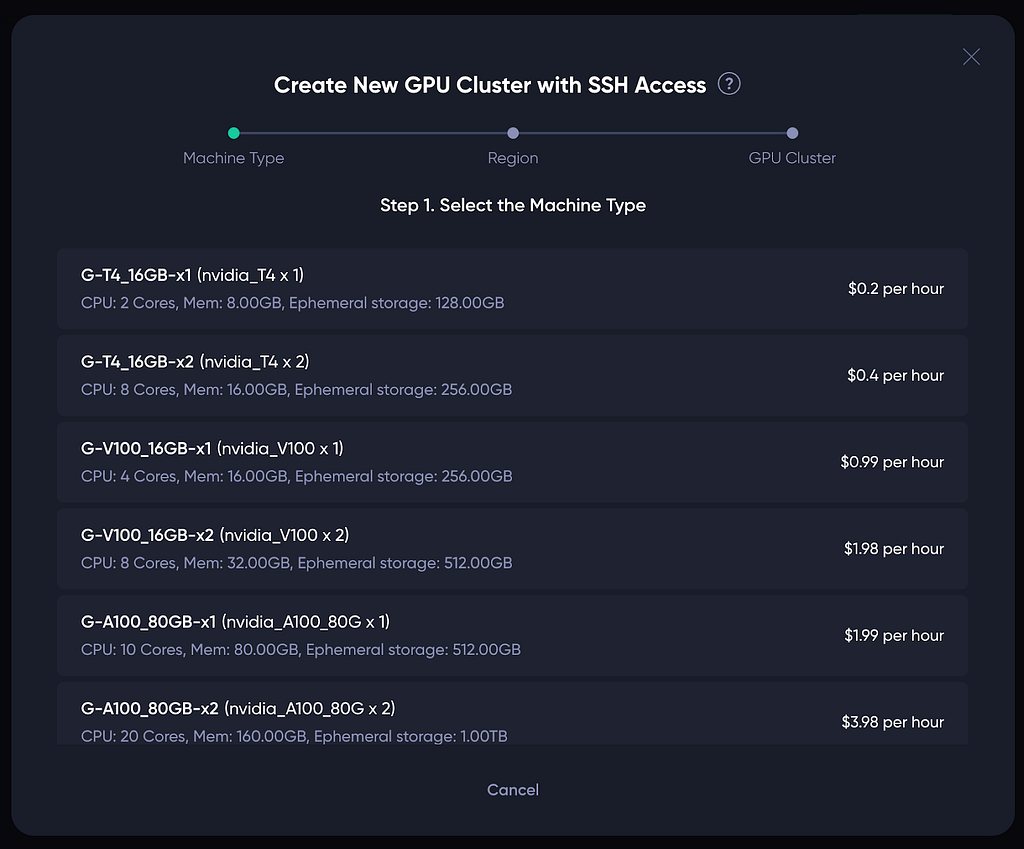
Next, click on “New GPU Cluster”. You should see the a modal like below popping up which will guide you through the 3-step process to create a GPU cluster.
For the first step, simply click on the type of machine you want to create your cluster with. In the example, we create our cluster with the G-H100_80GB-x2 machine type.

The second step shows the regions where the type of machine chosen are available. For example, the GPU machine type we chose in the first step is available in region asia-east-1 and asia-southeast-1. Click on the region where you want to launch the GPU cluster, and the following UI should show up:
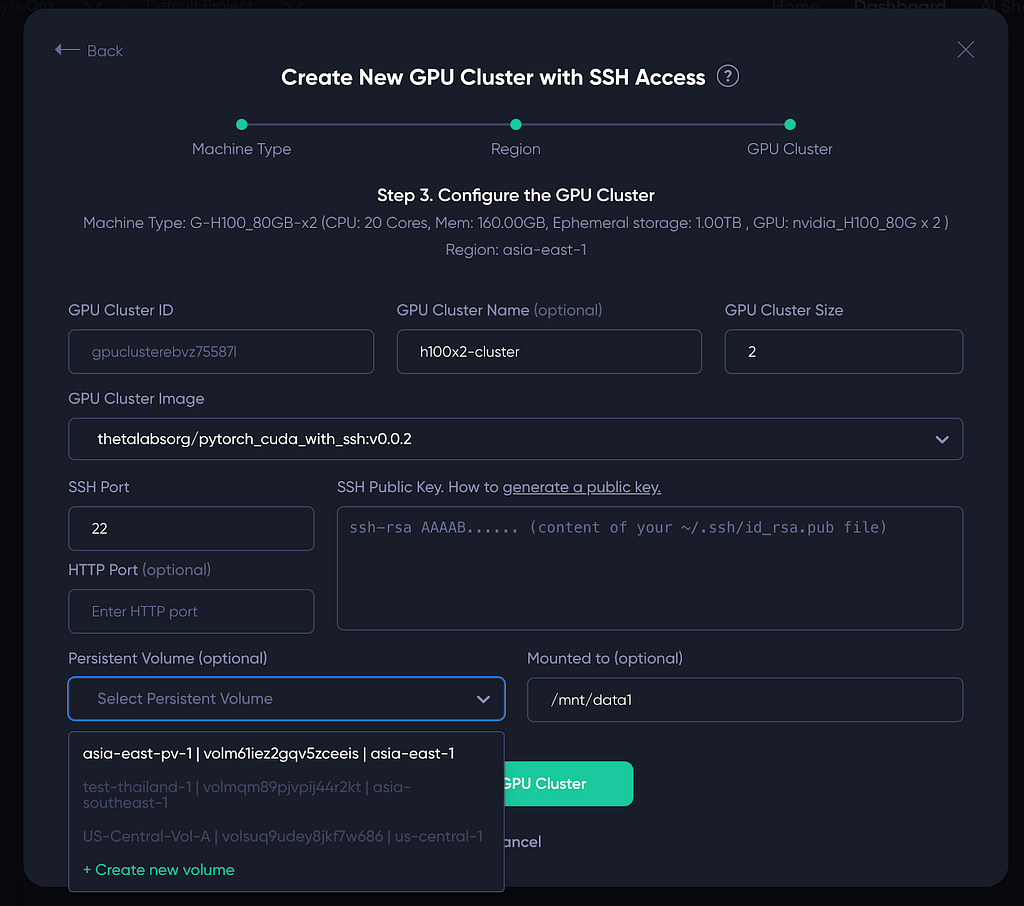
Most fields on the UI are self-explanatory. In particular:
After filling in the above fields, please click on the “Create GPU Cluster” button to launch the GPU cluster, which should also redirect you to a page similar to the following:

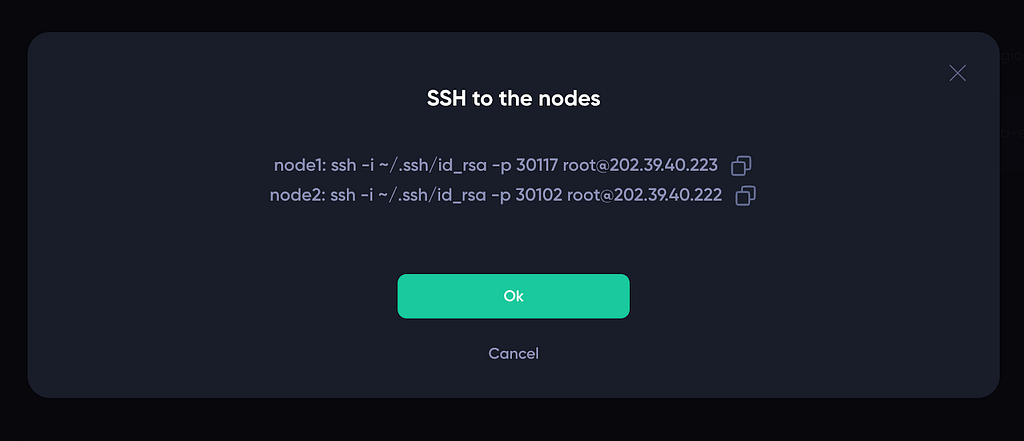
Depending on the size of the container image, it may take a few minutes to fire up the GPU node. Once it is up and running, you can connect to the node via SSH. Simply click the green “Show” button in the above screenshot to see the SSH commands for each GPU node in the cluster.
Alternatively, you can click anywhere on the row to see the details on the GPU cluster.

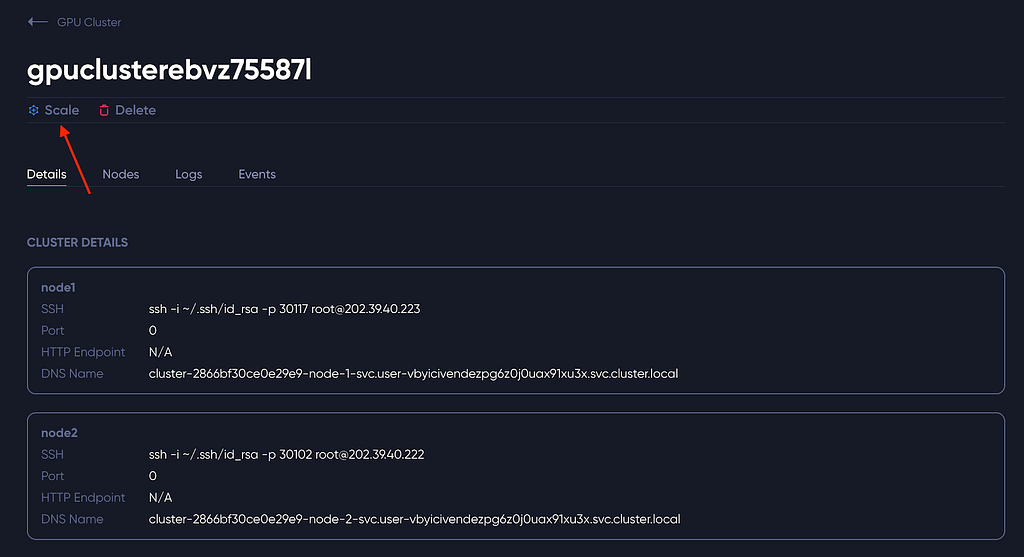
You should see a the GPU Cluster details page similar to the following:
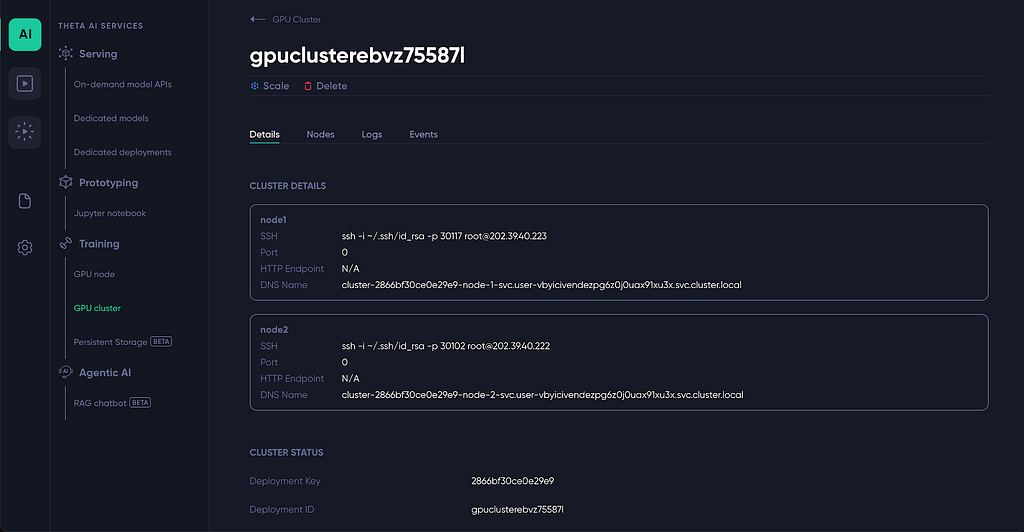
For each of the GPU Node in the cluster, the page lists:
By default a GPU node can communicate with any other node in the cluster through ANY port using the DNS name of the target node. In the following, we run a process in Node2 listening to port 5678. Then, in Node1, we can run the nc command to connect to this port using Node2’s DNS name listed on the details page:
Shell
nc -vz cluster-2866bf30ce0e29e9-node-2-svc.user-vbyicivendezpg6z0j0uax91xu3x.svc.cluster.local 5678

If needed, you can add more GPU nodes (same type same region) to the cluster while the cluster is running. To do this, on the GPU Cluster details page, click on the “Scale” button.
You should see the following pop-up modal:

Enter the number of new nodes you want to add to the cluster, and click the “Add Nodes” button. Refresh the details page, you should see new GPU nodes added to the cluster shortly.
Theta EdgeCloud adds GPU cluster feature, allowing users to train large AI models with multiple… was originally published in Theta Network on Medium, where people are continuing the conversation by highlighting and responding to this story.
1
1
 Manage all your crypto, NFT and DeFi from one place
Securely connect the portfolio you’re using to start.

0
0

0
0

0
0

0
0
