Spinning up a Tezos node in under a few minutes
0
1
An introduction to booting up a Tezos node using snapshots and history modes.
This is a composite post derived from Nomadic Labs’ post: ‘Introducing Snapshots and History Modes for the Tezos Node’ and Nomadic Labs CTO Benjamin Canou’s recent presentation: ‘How to Quickly Boot a Tezos Node: a brief presentation of snapshots and history modes’.
Spinning up a node on most blockchains takes an enormous amount of disk space and a long time to sync up to the head of the chain from the associated genesis block. This has also been true for Tezos, which requires approximately 120GB of disk space for archive nodes and a few days (on a typical connection) to synchronize the whole chain since June 30, 2018 (Tezos launch date).
The recently introduced ‘History Modes and Snapshots’ feature helps resolve this challenge, making it quick and easy to spin up a Tezos node. A positive outcome of this feature is that it makes it easier for solo bakers to participate and independently secure the system.
Let’s do a quick recap of History Modes and then proceed to see how we can use a snapshot to quickly boot a Tezos node. Lastly, let’s see how to do simple Garbage Collection using snapshots to safely recover disk space.
History Modes
History modes allow nodes to run without having to maintain full archives of the chain’s past states.
Here are the first three history modes that have been introduced:
- archive nodes store everything. This corresponds to the current behaviour of Tezos nodes.
- full nodes store all chain data since the beginning of the chain, but drop the archived contexts below the current checkpoint. In other words, you can still query any block or operation at any point in the chain, but you cannot query the balances or staking rights too far in the past.
- rolling nodes are currently the most lightweight, only keeping a minimal rolling fragment of the chain and deleting everything before this fragment (blocks, operations and archived contexts).
ARCHIVE History Mode
This is the current default mode in mainnet.
What you can do with an archive node:
- safely validate new blocks and operations
- bake and endorse
- access all the blocks and operations in history
- allow archive nodes to synchronize
- access all balances at any point in the past
- use a lot of disk space (for now)
FULL History Mode
This is the planned new default mode in mainnet as it is sufficient for almost everyone. Running a full node is enough to maintain the full chain history and the network does not lose any security by adopting full as the default.
What you can do with a full node:
- safely validate new blocks and operations
- bake and endorse
- access all the blocks and operations in history
- allow archive nodes to synchronize
- a̶c̶c̶e̶s̶s̶ ̶a̶l̶l̶ ̶b̶a̶l̶a̶n̶c̶e̶s̶ ̶a̶t̶ ̶a̶n̶y̶ ̶p̶o̶i̶n̶t̶ ̶i̶n̶ ̶t̶h̶e̶ ̶p̶a̶s̶t̶
- u̶s̶e̶ ̶a̶ ̶l̶o̶t̶ ̶o̶f̶ ̶d̶i̶s̶k̶ ̶s̶p̶a̶c̶e̶
ROLLING History Mode
This is the most lightweight mode, only keeping a minimal rolling fragment of the chain and deleting everything before this fragment (e.g. blocks, operations and archived contexts).
What you can do with a rolling node:
- safely validate new blocks and operations
- bake and endorse
- a̶c̶c̶e̶s̶s̶ ̶a̶l̶l̶ ̶t̶h̶e̶ ̶b̶l̶o̶c̶k̶s̶ ̶a̶n̶d̶ ̶o̶p̶e̶r̶a̶t̶i̶o̶n̶s̶ ̶i̶n̶ ̶h̶i̶s̶t̶o̶r̶y̶
- a̶l̶l̶o̶w̶ ̶a̶r̶c̶h̶i̶v̶e̶ ̶n̶o̶d̶e̶s̶ ̶t̶o̶ ̶s̶y̶n̶c̶h̶r̶o̶n̶i̶z̶e̶
- a̶c̶c̶e̶s̶s̶ ̶a̶l̶l̶ ̶b̶a̶l̶a̶n̶c̶e̶s̶ ̶a̶t̶ ̶a̶n̶y̶ ̶p̶o̶i̶n̶t̶ ̶i̶n̶ ̶t̶h̶e̶ ̶p̶a̶s̶t̶
- u̶s̶e̶ ̶a̶ ̶l̶o̶t̶ ̶o̶f̶ ̶d̶i̶s̶k̶ ̶s̶p̶a̶c̶e̶
Booting quickly from a Snapshot
As the chain invariably grows every day, retrieving a full chain from the peer-to-peer network can be a very long process.
With the implementation of history modes, it is now possible to have an import/export feature: ‘Snapshots’. This procedure allows one to quickly gather all the data necessary to bootstrap a node from a single file.
Snapshots provide the following main advantages:
- A snapshotted node starts at approximately 500MB (as compared to 120GB for an archive node)
- Synchronisation to the head can be achieved in a few minutes from a recent snapshot (as compared to a few days for an archive node)
- Archived contexts can be reconstructed on demand.
Step 1: Exporting a snapshot from a full/archive node
This needs to be done by some entity that’s running a full or archive node and on a machine that is running mainnet or mainnet-snapshots .
> HASH='tezos-client rpc get /chains/main/blocks/head~30/hash | tr -d '''
> tezos-node snapshot export --block HASH HASH.full
> gzip HASH.full
Hopefully in the future, services will pop up to generate frequent snapshots and publish them for public use. Baking services and block explorers are in an ideal position to do this.
Step 2: Starting a node from a snapshot
The snapshot format does not (and cannot) provide any evidence that the imported block is actually a part of the current main chain of the Tezos network. To avoid being fooled by a fake chain, it is necessary to carefully check that the block hash of the imported block is included in the chain. This can be done by comparing the hash to one provided by another node under the user’s control, or by relying on social cues to obtain a hash from a large number of trusted parties which are unlikely to be colluding.
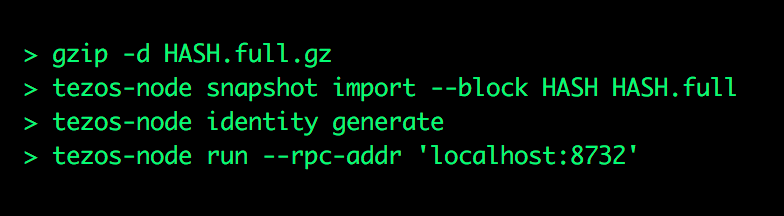
Then on a fresh mainnet-snapshotsinstallation:
> gzip -d HASH.full.gz
> tezos-node snapshot import --block HASH HASH.full
> tezos-node identity generate
> tezos-node run --rpc-addr 'localhost:8732'
After this your Tezos node should be up and running in a few minutes.
Simple Garbage Collection using Snapshots
As an aside, the snapshots feature can also be used to drop the archived contexts of a node and recover disk space. This is usually known in the programming language world as Garbage Collection (or GC).
> tezos-client rpc get /chains/main/blocks/head~30/hash
> tezos-node snapshot export --block HASH HASH.full
> tezos-node snapshot import HASH.full
> tezos-node run --rpc-addr 'localhost:8732'
In addition, there are several ongoing efforts (e.g. see plebeia or Irmin2) to implement an efficient garbage collection mechanism that can run transparently, and provide a better, more optimised storage more generally.
Special thanks to Arthur Breitman, Benjamin Canou, and Jacob Arluck for review.
References:
- ‘Introducing Snapshots and History Modes for the Tezos Node’ by Nomadic Labs.
- ‘How to Quickly Boot a Tezos Node: a brief presentation of snapshots and history modes’ by Benjamin Canou.
Spinning up a Tezos node in under a few minutes was originally published in tezos on Medium, where people are continuing the conversation by highlighting and responding to this story.
0
1

 Manage all your crypto, NFT and DeFi from one place
Securely connect the portfolio you’re using to start.


